Tuesday, February 26, 2019

How to Fix Split Screen/Split View Not Working on iPad/iPhone


Tip 1. Enable Allow Multiple Apps

The first thing you should do when faced with this problem is make sure that “Multiple Apps” is enabled.

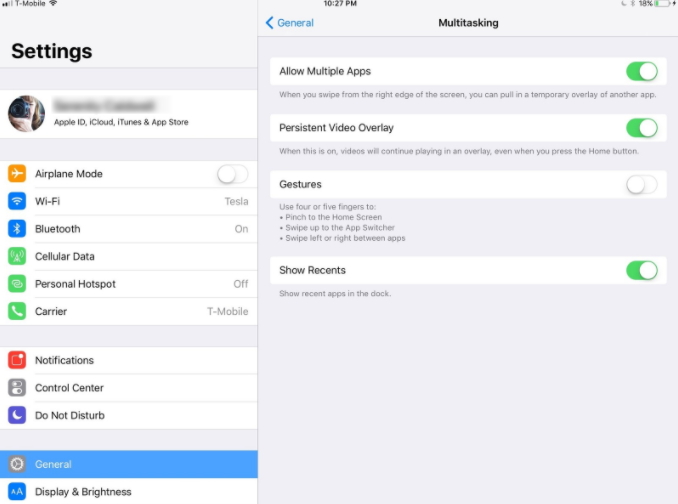
Step 1: Go to Settings > General > Multitasking.

Step 2: Ensure that “Allow Multiple Apps” is enabled.

If it is, disable it and then turn it on again.

Tip 2. Use Split View/Slide Over Correctly

It is also important to ensure that you are using the feature correctly. The multi-tasking feature in iOS 11, 11.1, 11.2 is different from the one in iOS 10 and therefore if you try to use it like you did with iOS 10, it is bound to fail. Here’s how to use it correctly in iOS 11, 11.1, 11.2.

From the iPad Dock:

Step 1: Swipe from the bottom to bring up the Dock.

Step 2: Tap and Drag on app to enable the multitasking feature.

Step 3: Drag the app to the screen and if you’d like to use the Split View, drag it to the left or right side. If you’d like to use Slide Over, drag it to the center of the screen and then release it.

From the Home Screen:

Step 1: Press the Home button and tap and drag an app to enable multi-tasking.

Step 2: While dragging the first app, tap on the second app with your other finger.
Tip 3. Enable Auto Rotate Screen Mode

You should also know that the Split View or Slide Over function will not work on an iPhone or iPad in iOS 11 if the iPad is in Landscape mode. You therefore need to enable “ Auto Screen Rotate” for the feature to work correctly. You can do than by swiping up from the bottom of your iPad screen to open the Control Center. Here, tap the screen rotate icon to enable “Auto Screen Rotate.”


Tip 4. Fix Split Screen Bug with a Reliable Tool

Sometimes the problem maybe software related which means there is very little you can do about the problem, short of resetting the device. In this case, you need a reliable tool that is designed to help you overcome these types of problems by fixing the iOS. This tool is iMyFone D-Back iOS System Recovery and the following are just some of its features;Sponsor ads:Best iOS Emulator For Windows To Build & Run iOS Apps
Must Read:If you lost data after you updated to a new iPhone, you can always use Gihosoft iPhone Data Recovery to get the data back from the old iPhone or backup.

Gihosoft Free iPhone Data Recovery:iphonerecovery.com

If you use android phones, please choose Gihosoft Android Data Recovery

Sponsor ads:emoji font 3 apk

Sponsor ads:Use Remote Desktop Connection in Windows 10

How to Fix iPhone Backup Corrupt or Not Compatible? 2019

How to Fix iPhone Backup Corrupt or Not Compatible? 2019

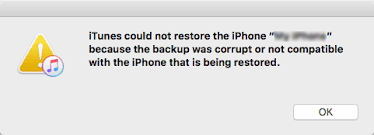
"Hi, I have a query. While restoring iPhone backup, I was stuck with 'iPhone backup corrupt or not compatible' error. It says 'iTunes could not restore the iPhone (my name) because the backup was corrupt or not compatible with the iPhone that is being restored'. I have no idea about this. Can you please tell me how I can fix it?" ----From an iPhone User


iTunes is the most commonly used tool for many iOS device users whenever it comes to backup or restore their devices. However, we can’t tell when a problem can occur and make the process not smooth as expected. This error message saying "backup was corrupt or compatible" can not only occur when restoring iPhone, but also when you are backing up your iPhone. Also this error can happen to the other iOS devices such as iPhone 8, iPhone X, iPad, iPod touch as well.


This time, we are going to explain to you what to do when iPhone backup gets corrupt or not compatible when restoring or backing up using iTunes. First, we would like you explain why this error occurs.


1. Why Is iPhone Backup Corrupt?


2. How to Fix Corrupt iPhone Backup When Backing up iPhone


3. How to Fix Corrupt iPhone Backup When Restoring iPhone
Why Is iPhone Backup Corrupt?

While making backup through iTunes, there is a possibility of invisible errors. In other words, sometimes, some error occurs due to unknown reasons and iTunes just doesn't notify you, but in fact these errors hinder the backup process. When you think you have made a successful backup, you become wrong since the hidden error didn’t let you do it properly.

Another reason could be compatibility problem. For instance, suppose you have upgraded your device to the latest iOS and then made a backup. Now, you have want to restore the backup to an old device running an old iOS. iTunes won’t allow you to restore the data you backed up to that device.
How to Fix Corrupt iPhone Backup When Backing up iPhone

There are 2 ways to fix this problem. You can check the detailed explanation below
Way 1: Delete the Backup and Back up Again

First thing you need to try when iPhone backup corrupt or not compatible error pop-up is to delete the old backup that you made earlier and then try to make another backup once again using iTunes. For deleting, follow the given steps.


Open iTunes on your PC and go to Tunes option on upper left corner.


Choose "Edit" and then "Preferences". Now, select "Devices" and look for the device name.


Subsequently, look for that corrupt or incompatible backup and select it.


Hit the "Delete Backup" button followed by clicking on "Delete".


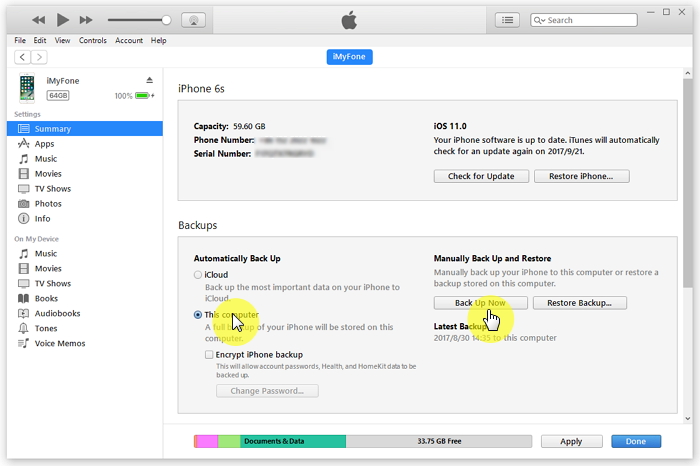
Now, backup your data again. Go back to iTunes main window. Click iPhone icon. In the Summary section, click "Back Up Now". Wait for a while until it finishes. We recommend that you update your iTunes to the latest version before doing anything.


Way 2: Use an iTunes Alternative to Selectively Backup iPhone (Free)


Sponsor ads:

Gihosoft Free iPhone Data Recovery:https://www.gihosoft.com/iphone-data-recovery-free.html

Gihosoft iPhone Data Recovery Free

Free iPhone Data Recovery Software for Windows/Mac

Recover up to 12+ types of files, including contacts, SMS, photos, WhatsApp, Viber, notes, etc.

Restore lost data from iOS devices directly or from iTunes and iCloud backup

Recover iPhone data lost due to iOS upgrade/jailbreak, accidental deletion, device lost or broken

Support all the latest iPhone, iPad and iPod Touch

Both Free and Pro version.

If you lost data after you updated to a new iPhone, you can always use Gihosoft iPhone Data Recovery to get the data back from the old iPhone or backup.You may also like: iphonerecovery.com

If you use android phones, please choose Gihosoft Android Data Recovery.

With Gihosoft Android Data Recovery, no longer afraid of data loss!

Must read:Youtube video downloader for pc

Gihosoft RePicvid Free Photo Recovery Software provides a free photo recovery software for windows to help users recover the deleted or lost photo for free.

Jihosoft Android Data Recovery: the best Android Data Recovery software for Windows and Mac to recover deleted contacts, messages, photos, videos, WhatsApp and etc from Android devices.Tips:How to transfer messages from iPhone to iPhone


jihosoft Free iPhone Data Recovery

iPhone X / 8 Won’t Restore from iTunes Backup? Here are 6 Solutions

iPhone X / 8 Won’t Restore from iTunes Backup? Here are 6 Solutions
Tip 1. Check Internet connection

In order for the iTunes backup to be restored, you would need a stable working internet connection. So, make sure to check that the router is working normally and none of the cables have been unplugged. You can also check the internet and the wireless settings of your system to ensure that internet is connected.


Tip 2. Check space on disk

iTunes backup files can be bulky. You should always make it a point to see the available free space on your system. If your device and/or the system don’t have an adequate space, the error message may pop up. Clear the space and the restoration should resume.


Tip 3. Download the right firmwarek

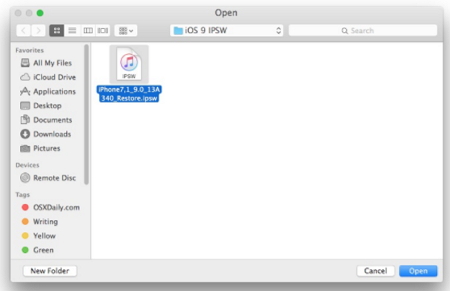
If the firmware downloaded on your device is not right, iTunes will not be able to complete the restoration process. It is better to let iTunes download the firmware automatically rather than forcing it to download specific iOS firmware files.

So, let iTunes download the right firmware for your device.


Tip 4. Check USB cables

Sometimes the UB cables tend to act up and it might be the cause for failure of iTunes backup restoration.


If you are using a third party cable, it might not be Apple certified. So, switch to Apple cables.


Sometimes PCs have an erroneous USB port too. So, you should try and shuffle the port and connect your phone to another port on the same device.


Make sure that the USB cable you are using is not broken as this can disrupt the communication.


Try to avoid USB hubs and accessory port and ensure a direct connection of the device to the computer.


Tip 5. Check your router

You should make it a point to check if the router is choking the iTunes. So, keep an eye on the internal firewall and see if the internet is thoroughly connected or not.


Tip 6. Alternative to restore form iTunes backup without data loss
Sponsor ads:Factory Reset Your iPad without Passcode or iTunesMust Read:If you lost data after you updated to a new iPhone, you can always use Gihosoft iPhone Data Recovery to get the data back from the old iPhone or backup.

Gihosoft Free iPhone Data Recovery:iphonerecovery.com


If you use android phones, please choose Gihosoft Android Data Recovery

Add Songs to iPad 2019


1 Add Songs to iPad without iTunes via iCloud

You can add songs to your iPad using iCloud, even though by default it serves as a backup to your device. Regardless, you can also use the iCloud to add music to iPad without iTunes.

Step 1: Using the browser on your computer, visit “icloud.com” and log in using your Apple id.

Step 2: Next, click on the “iCloud Drive” icon and then select “Upload” to transfer songs from your computer to your iPad. Alternatively, you can also use the Drag and Drop option.

Step 3: To see your transferred songs, simply check the songs you uploaded on the “iCloud Drive” on your iPad.


Note

You need a data connection for this to work; your songs will not be synced with your media player, you can only access and play them directly from the iCloud Drive.
How to Add Songs to iPad With iTunes

As there are many ways to add songs to iPad without iTunes, you can also equally add song to your iPad using iTunes, below is a step by step approach of how to use iTunes to add/transfer songs to your iPad;

Step 1: Using your UB Cable, connect your device to your computer.

Step 2: Launch iTunes. Ensure you are running the latest iTunes version.

Step 3: Now, select the music files that you would like to transfer to your device from your iTunes library.

Step 4: Check the left part in the sidebar portion of your device, then carefully drag and drop the music files you wish to transfer to your iPad.


Comparison of TunesMate, iCloud and iTunes

Sponsor ads:

Gihosoft Free iPhone Data Recovery:https://www.gihosoft.com/iphone-data-recovery-free.html

Gihosoft iPhone Data Recovery Free

Free iPhone Data Recovery Software for Windows/Mac

Recover up to 12+ types of files, including contacts, SMS, photos, WhatsApp, Viber, notes, etc.

Restore lost data from iOS devices directly or from iTunes and iCloud backup

Recover iPhone data lost due to iOS upgrade/jailbreak, accidental deletion, device lost or broken

Support all the latest iPhone, iPad and iPod Touch

Both Free and Pro version.

If you lost data after you updated to a new iPhone, you can always use Gihosoft iPhone Data Recovery to get the data back from the old iPhone or backup.You may also like: iphonerecovery.com

If you use android phones, please choose Gihosoft Android Data Recovery.

With Gihosoft Android Data Recovery, no longer afraid of data loss!

Must read:Youtube video downloader for pc

Gihosoft RePicvid Free Photo Recovery Software provides a free photo recovery software for windows to help users recover the deleted or lost photo for free.

Jihosoft Android Data Recovery: the best Android Data Recovery software for Windows and Mac to recover deleted contacts, messages, photos, videos, WhatsApp and etc from Android devices.Tips:How to transfer messages from iPhone to iPhone
jihosoft Free iPhone Data Recovery

Friday, July 13, 2018

How to Lock, Find and Erase All Data On Your Phone Remotely

Requirements:


These requirements are important to get everything done remotely. So, it’s important you set these up beforehand in case the time comes you lost your phone. And also, if you realized you lost your phone you should immediately perform these actions otherwise, you are giving the thief a handful of time to make something to your phone.


Phone Location must be turned on.


The phone itself must be turned on.


It must be signed to your Google Account.


It must have an internet connection.


The “Find my Device” Feature must be turned on.
Find Your Phone Remotely


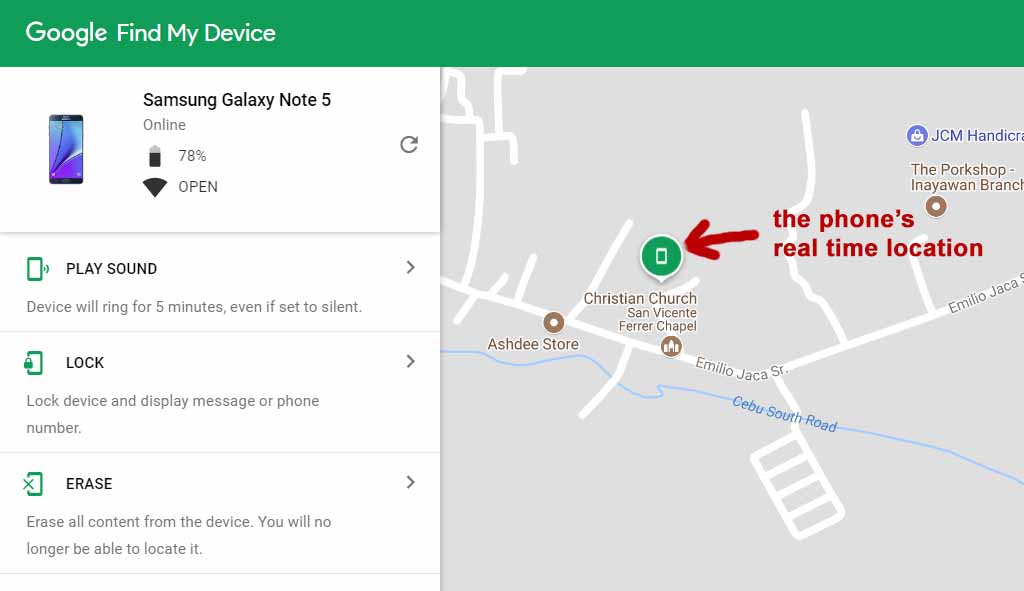
You can easily find your phone EXACT location using this feature! Yes, the exact location simply follows the tutorial and requirements must be met first.


Tutorial:


To get everything started to go android.com/find


Sign in with your Google email the same that account was signed on your phone.


Give time to connect to your phone.


Then it will give you the real-time location of your phone! Yes, REAL-TIME.


Lock Your Phone Remotely


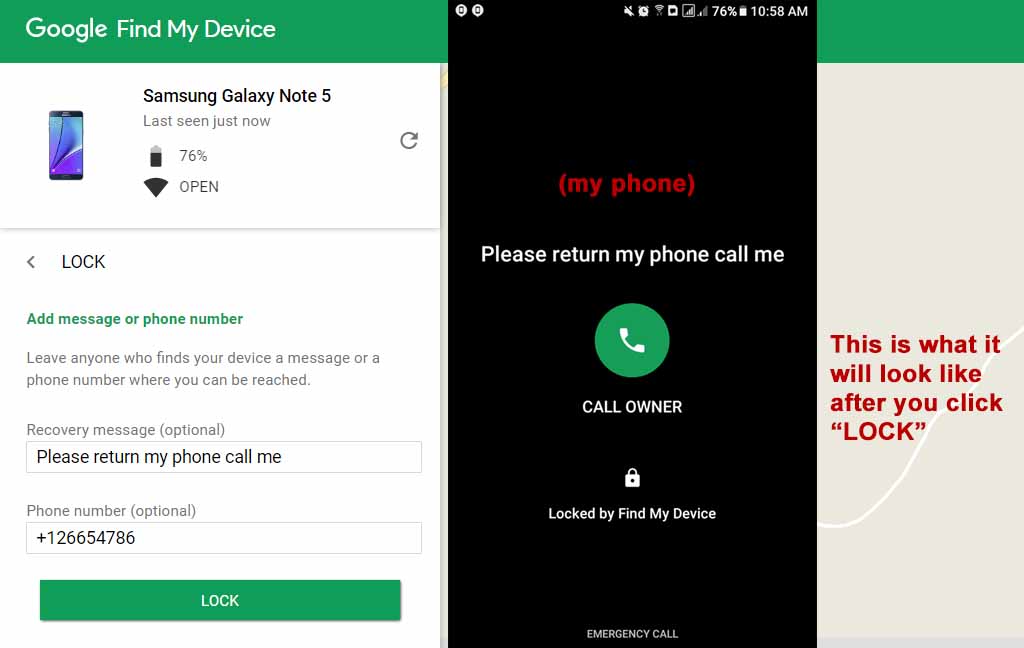
Now on locking your android device its just a few clicks away. Lock your phone and enter your phone number know the holder of your phone to contact you. Which is unlikely if your phone was stolen.


Tutorial:


Click the “Lock” Option and then enter a message and your phone number to get your contact.


Just like the image below.


On the right (phone’s end), this is what it will look like.


Erase Data On Your Phone Remotely


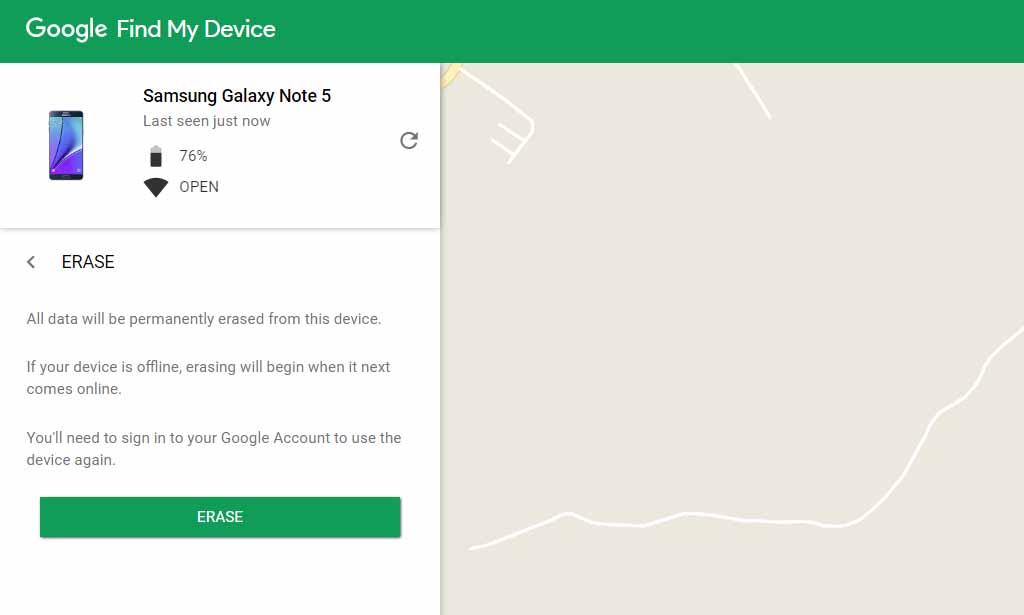
If every action you do fails. The thief won’t return your phone then this is your last resort. Erase all the data in it for GOOD! This will erase all your pictures, videos, contact list, messages and everything. The phone will be like the phone you have just bought it, empty on anything. And it will still remain locked after this.


Tutorial:


Go to Erase feature and then click on the erase.


Done!


This will erase everything you have on your phone.


Google put a lot of effort there to get everything is secured for you and your data. These features are all put together to protect your data but your phone can still be operational after everything. The thief can still do some magic on your phones program and reset everything bypassing every security feature and make the phone working again. But of course without your data. That’s the most important right?Gihosoft Android data recovery Free is a super awesome software specialized in Android file recovery. With this program, you are able to recover deleted photos, music, videos, messages, contacts, call logs, WhatsApp messages, Viber chat history and more from Samsung, Huawei, LG, HTC, Motorola, Google, Oneplus, Sony, Lenovo, ZTE and other Android devices directly. Meanwhile, this Android data recovery software is available for both Windows and Mac platforms.https://www.gihosoft.com/android-data-recovery-free.html

Saturday, June 16, 2018

How to Enable or Disable Restricted Mode in YouTube on iPhone, iPad or PC

How to Enable or Disable Restricted Mode in YouTube on iPhone, iPad or PC

Have you seen any inappropriate content

in YouTube while watching on iPhone? Want to avoid mucky contents on

YouTube? How can you enable Restricted mode on YouTube? What is Restricted Mode

on YouTube?  

Here’s a quick guide that helps you to enable Restricted Mode in

YouTube on iPhone that prevents you, your family and your Kids from sensitive

and grimy contents you do not prefer to see. So for kids,

parental controls on iPhone or any smartphones is important to stop them

from mucky contents.  Gihosoft iPhone Data Recovery is a professional iPhone Data Recovery software to get back all your lost text message, photo, video, call history, note, contact and more from iPhone/iPad/iPod Touch. It offers a full solution to recover your lost data in different tough situations. Besides recovering data directly from iPhone, iPad and iPod touch, it also allows you to recover data from iCloud and iTunes backup files.


If your kids is using YouTube on iPhone

all the time, then you should enable the Restricted Mode on it because it can

create a negative impact on them. There are so many users who posted a filthy

and obscene contents on YouTube. Restricted Mode hides videos that may contain

inappropriate content flagged by users and other signals. No filter is 100%

accurate, but it should help you avoid most inappropriate content.

YouTube has become major platform for

Videos all over the World where you can find and access with all sort of videos

like Tech info, Tips, Songs, Movies, and hot contents to enjoy. Many users

around world use YouTube all the time as a time pass and enjoyment. You can

always disable Restricted Mode if wanted to see adult content but what if for

your Kids and your family or sometimes you?

Also See:

How to Enable Dark Mode on iPhone without Jailbreak

How to Download YouTube Videos in iOS 10.3.1 without

Jailbreak

How to Record iPhone Screen without Jailbreak

Well there is an optional setting

called Restricted Mode on YouTube app in iPhone that you can use to help screen

out potentially mature content which you may prefer not to see or don’t want

others in your family to see. You can filter or avoid the restricted content on

YouTube to prevent your Kids/Family from filthy contents by enabling the

Restricted Mode in YouTube settings.

How to Enable Restricted Mode in YouTube

on iPhone

Once you have enabled the Restricted

Mode on YouTube in iPhone, you will no longer see the filthy contents.

Step 1. Launch YouTube app on your

iOS device.


Step 2. Tap on your profile

& tap on Settings.

Step 3. Now tap on Restricted

Mode Filtering.

Step 4. Select Strict.


That’s it. You can see the Filtered videos

on your YouTube.

Likewise if you want to disable &

willing to watch obscene content on YouTube you can disable restricted mode

filtering, by choosing Don’t Filter option.

To disable YouTube Restricted Mode,

follow the same steps as above upto Step 3 and then choose Don’t filter.

Similarly, you can enable Restricted

Mode in YouTube in Safari, Chrome, and Firefox on iPhone and iPad as well.

For this you need to go to youtube.com in

your web browser (Safari, Chrome or Firefox).

From the top right corner tap on

the three dots and then tap on Settings.

You can see the some options like

Language, Location, Restricted Mode and more.

Simply tap on Restricted Mode to

turn it on or off whenever you want.

If you are using YouTube on Computer or

PC, you can easily Enable Restricted Mode in YouTube on Computer by simply

heading over to youtube.com from any browser, scroll down to bottom and click

on Restricted Mode and then click next to On and save to confirm.

Follow the same steps and then click

next to Off and save to disable Restricted Mode on YouTube any time you like.

Saturday, June 9, 2018

Remove Multiple iPhone Contacts Using Contacts for Mac (For Mac Users)

Remove Multiple iPhone Contacts Using Contacts for Mac (For Mac Users)


Mac has a Contacts application that can be used to delete multiple contacts on iPhone. For this method to work, you have to be signed into the same iCloud account on your iPhone and your Mac. You should also make sure that Contacts is on in both your Mac and iPhone.


To sign into iCloud on Mac, follow the simple steps below:


Step #1: Open the Mac System Preferences and then choose iCloud.

Step #2: Use the same Apple ID and Password that you used to sign into iCloud on your iPhone to sign into iCloud on your mac. Check contacts to ensure that the contacts on the Mac and your iPhone can sync.


Now that you have signed into iCloud on the Mac and checked Contacts, you can delete your multiple contacts by following the steps below:


Step #1: On your Mac, locate Contacts app and open it. Contacts app is available in Applications.

Step #2: Hold the command button down on your keyboard. Next, click the contacts you don’t need anymore.

Step #3: After selecting the contacts, release the command button and then right click on the selected contacts.

Step #4: Click Delete Cards and then click the Confirm Delete button to remove the unwanted contacts from your contact list. Since your iPhone and Mac Contacts apps are syncing, the changes you make in the Contacts app should be reflected on your iPhone.Gihosoft iPhone Data Recovery https://goo.gl/LF7B13 Gihosoft iPhone Data Recovery is a professional iPhone Data Recovery software to get back all your lost text message, photo, video, call history, note, contact and more from iPhone/iPad/iPod Touch. It offers a full solution to recover your lost data in different tough situations. Besides recovering data directly from iPhone, iPad and iPod touch, it also allows you to recover data from iCloud and iTunes backup files. https://www.gihosoft.com/iphone-data-recovery-free.html


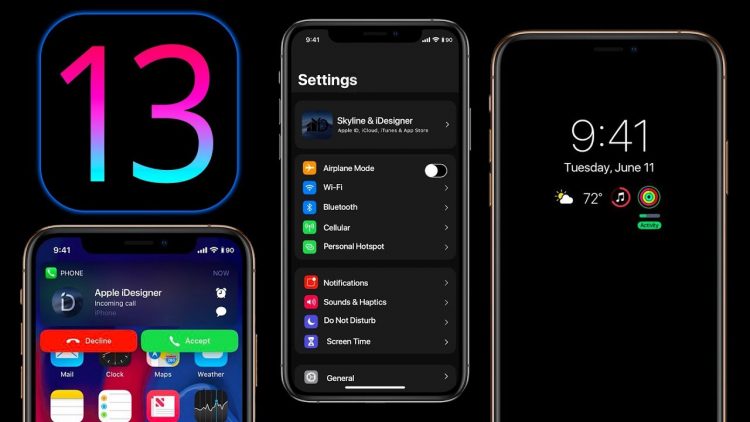
iOS 13 To Introduce Dark Mode

Image Credit: ilounge.com Dark mode has been the most-wanted feature on mobile phones and Google and Samsung are making sure of that. While ...