Saturday, June 16, 2018

How to Enable or Disable Restricted Mode in YouTube on iPhone, iPad or PC

How to Enable or Disable Restricted Mode in YouTube on iPhone, iPad or PC

Have you seen any inappropriate content

in YouTube while watching on iPhone? Want to avoid mucky contents on

YouTube? How can you enable Restricted mode on YouTube? What is Restricted Mode

on YouTube?  

Here’s a quick guide that helps you to enable Restricted Mode in

YouTube on iPhone that prevents you, your family and your Kids from sensitive

and grimy contents you do not prefer to see. So for kids,

parental controls on iPhone or any smartphones is important to stop them

from mucky contents.  Gihosoft iPhone Data Recovery is a professional iPhone Data Recovery software to get back all your lost text message, photo, video, call history, note, contact and more from iPhone/iPad/iPod Touch. It offers a full solution to recover your lost data in different tough situations. Besides recovering data directly from iPhone, iPad and iPod touch, it also allows you to recover data from iCloud and iTunes backup files.


If your kids is using YouTube on iPhone

all the time, then you should enable the Restricted Mode on it because it can

create a negative impact on them. There are so many users who posted a filthy

and obscene contents on YouTube. Restricted Mode hides videos that may contain

inappropriate content flagged by users and other signals. No filter is 100%

accurate, but it should help you avoid most inappropriate content.

YouTube has become major platform for

Videos all over the World where you can find and access with all sort of videos

like Tech info, Tips, Songs, Movies, and hot contents to enjoy. Many users

around world use YouTube all the time as a time pass and enjoyment. You can

always disable Restricted Mode if wanted to see adult content but what if for

your Kids and your family or sometimes you?

Also See:

How to Enable Dark Mode on iPhone without Jailbreak

How to Download YouTube Videos in iOS 10.3.1 without

Jailbreak

How to Record iPhone Screen without Jailbreak

Well there is an optional setting

called Restricted Mode on YouTube app in iPhone that you can use to help screen

out potentially mature content which you may prefer not to see or don’t want

others in your family to see. You can filter or avoid the restricted content on

YouTube to prevent your Kids/Family from filthy contents by enabling the

Restricted Mode in YouTube settings.

How to Enable Restricted Mode in YouTube

on iPhone

Once you have enabled the Restricted

Mode on YouTube in iPhone, you will no longer see the filthy contents.

Step 1. Launch YouTube app on your

iOS device.


Step 2. Tap on your profile

& tap on Settings.

Step 3. Now tap on Restricted

Mode Filtering.

Step 4. Select Strict.


That’s it. You can see the Filtered videos

on your YouTube.

Likewise if you want to disable &

willing to watch obscene content on YouTube you can disable restricted mode

filtering, by choosing Don’t Filter option.

To disable YouTube Restricted Mode,

follow the same steps as above upto Step 3 and then choose Don’t filter.

Similarly, you can enable Restricted

Mode in YouTube in Safari, Chrome, and Firefox on iPhone and iPad as well.

For this you need to go to youtube.com in

your web browser (Safari, Chrome or Firefox).

From the top right corner tap on

the three dots and then tap on Settings.

You can see the some options like

Language, Location, Restricted Mode and more.

Simply tap on Restricted Mode to

turn it on or off whenever you want.

If you are using YouTube on Computer or

PC, you can easily Enable Restricted Mode in YouTube on Computer by simply

heading over to youtube.com from any browser, scroll down to bottom and click

on Restricted Mode and then click next to On and save to confirm.

Follow the same steps and then click

next to Off and save to disable Restricted Mode on YouTube any time you like.

Saturday, June 9, 2018

Remove Multiple iPhone Contacts Using Contacts for Mac (For Mac Users)

Remove Multiple iPhone Contacts Using Contacts for Mac (For Mac Users)


Mac has a Contacts application that can be used to delete multiple contacts on iPhone. For this method to work, you have to be signed into the same iCloud account on your iPhone and your Mac. You should also make sure that Contacts is on in both your Mac and iPhone.


To sign into iCloud on Mac, follow the simple steps below:


Step #1: Open the Mac System Preferences and then choose iCloud.

Step #2: Use the same Apple ID and Password that you used to sign into iCloud on your iPhone to sign into iCloud on your mac. Check contacts to ensure that the contacts on the Mac and your iPhone can sync.


Now that you have signed into iCloud on the Mac and checked Contacts, you can delete your multiple contacts by following the steps below:


Step #1: On your Mac, locate Contacts app and open it. Contacts app is available in Applications.

Step #2: Hold the command button down on your keyboard. Next, click the contacts you don’t need anymore.

Step #3: After selecting the contacts, release the command button and then right click on the selected contacts.

Step #4: Click Delete Cards and then click the Confirm Delete button to remove the unwanted contacts from your contact list. Since your iPhone and Mac Contacts apps are syncing, the changes you make in the Contacts app should be reflected on your iPhone.Gihosoft iPhone Data Recovery https://goo.gl/LF7B13 Gihosoft iPhone Data Recovery is a professional iPhone Data Recovery software to get back all your lost text message, photo, video, call history, note, contact and more from iPhone/iPad/iPod Touch. It offers a full solution to recover your lost data in different tough situations. Besides recovering data directly from iPhone, iPad and iPod touch, it also allows you to recover data from iCloud and iTunes backup files. https://www.gihosoft.com/iphone-data-recovery-free.html


Delete Multiple/All Contacts on iPhone in iCloud

Delete Multiple/All Contacts on iPhone in iCloud

Using iCloud to delete all contacts or multiple contacts is much easier. This is because you get a chance to select and batch-delete the selected contacts. The process may not be immediately obvious. This is why we have included the steps below to help you do it:
Step #1: On a computer’s web browser, open iCloud.com.
Step #2: Using your Apple ID and Password, log into iCloud. Make sure that the iCloud account you log into is the same account that syncs your iPhone.
Step #3: Tap the Contacts icon.
Step #4: For Mac users, you will need to hold down the command button. For Windows PC users, you will need to hold down the Control button (Ctrl). While holding down either the Command or the Control button depending on the computer you are using, click on each contact you would like to delete. This makes it possible for you to select more than one contact.
Step #5: You can either click the Delete button available on your keyboard or you can click the small gear icon located at the bottom-left corner of the page and then select Delete on the menu that appears. Gihosoft iPhone Data Recovery https://goo.gl/LF7B13 Gihosoft iPhone Data Recovery is a professional iPhone Data Recovery software to get back all your lost text message, photo, video, call history, note, contact and more from iPhone/iPad/iPod Touch. It offers a full solution to recover your lost data in different tough situations. Besides recovering data directly from iPhone, iPad and iPod touch, it also allows you to recover data from iCloud and iTunes backup files. https://www.gihosoft.com/iphone-data-recovery-free.html
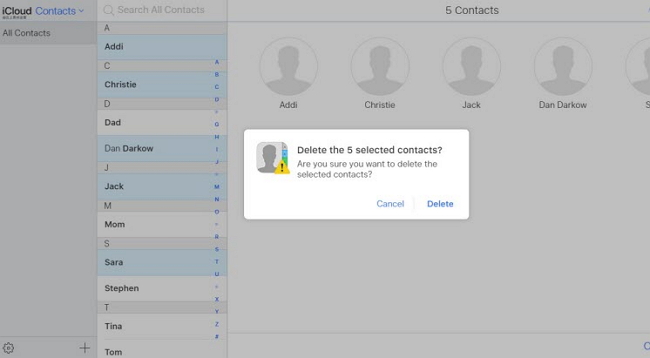
Step #6: Confirm that you wish to delete the selected contacts on the dialog box that shows. As long as syncing with iCloud is enabled on your iPhone, the changes should be reflected on your device.
delete multiple contacts on icloud

Tuesday, August 22, 2017

Android Oreo finally launched find out what all has changed

After lots of speculations and leaks, Android O has finally got the name as “OREO”. Google announced the name of its latest version of Android through a "live stream" and a short clip that first showed the O in Android O as the solar eclipse before the animation changed it into the Oreo. Sponsor ads:
Gihosoft iPhone Data Recovery Free


According to Google, the new update will be "safer, smarter, powerful and sweeter" than ever. Most of the features launched in the new update were already available in the developer preview for beta testers but with the final update, these new features are much more stable and refined. 

Must Read: Essential PH-1 launched with many questions unanswered

Features of Android Oreo 

Google has added features like ‘picture-in-picture’, improved notifications, autofill framework in Android 8.0 Oreo. Here’s a quick look at some top features.

First, Picture-in-picture will let users do two tasks simultaneously on any size screen, and apps like YouTube, Google Duo already support this. Essentially a user can continue watching a YouTube video and have their WhatsApp open at the same time.


In terms of notifications, the new notification dots will let users tap these and see what is new in the app. There’s also the Autofill framework, which will auto fill log-in for apps where users have granted permission. Additionally, developers of password manager apps can now use the new APIs to make this autofill option available to users in other apps. Google’s Android Developer blogpost says “Autofill will roll out fully over the next few weeks as part of an update to Google Play Services.”

Must Read: Essential Phones are available now, may have 2 years protection plan

Google Android 8.0 Oreo also promises improved battery life, and faster performance, with Android system minimizing background app activity. Google is claiming 2X boot speed with the new OS. Android 8.0 Oreo adds new limits on background location and wi-fi scans as well to improve battery capacity.  Android Oreo also comes with new fonts and diverse emojis. Developers can also download these for their apps.


There’s also “Adaptive icons” for developers, and the system “animates interactions with the icons, and uses them in the launcher, shortcuts, settings, etc.”  Android O will also bring “wide-gamut color” support for apps, and this should help imaging apps, especially on devices which have a new wide-gamut color capable display.

Wednesday, August 2, 2017

Some iPhone 4 tricks that can be really helpful for you

These are some iPhone 4 tricks that can be really helpful for you. 

1. Keyboard Trick #1. Instead of tapping once on the 123 button and then again on the ABC button when you're done, you can tap and hold the 123 button, then slide your finger to select the symbol you want to insert. Once it's been added, your keyboard will automatically revert back to the letters keyboard.Sponsor ads:
Gihosoft iPhone Data Recovery Free

2. Keyboard Trick #2. There are many additional symbols hidden within your keyboard that you may never have discovered. Tap the 123 button to go to the numbers and symbols keyboard, then tap and hold a symbol such as the pound sign to find other currencies.

3. Keyboard Trick #3. Instead of going to the symbol menu to find a full stop, you can double tap the space button. It'll add a full stop to the end of the word you've just typed and set you up ready to begin the next sentence.

4. Shake. If you've just typed a long sentence and accidentally deleted it, you can give your iPhone a shake to bring up the undo/redo button. Just make sure you're holding onto your iPhone tight before you shake it.

5. Go Back To Top.  You can tap at the very top of the iPhone's screen to go straight back to the top. This works in most iPhone apps.

6. Calculator Trick. If you use the calculator app a lot there's a handy time-saving trick you might not know exists. If you've just typed a long number and want to delete the most recent digit you entered, you can swipe left or right in the black area where your calculation appears.

7. Timer For Music. This is a cool trick for those of you who enjoy falling asleep to music. Using the hidden 'Stop Playing' timer, you can choose how long you want the music to play for as you drift off to sleep.To set up the timer, go to the clock app and then tap 'Timer' in the bottom right of the screen. Choose how long you want your timer to last for (you can choose a matter of minutes or hours if you'd prefer) and then tap 'When Timer Ends'. Here, scroll down to the bottom of the menu and select 'Stop Playing'. Press start on the timer and then begin playing your music from the Music app. When the timer ends, the music will fade to a stop.

8. Blink When You Receive A Message. If you find that the vibration or sound that your phone makes when you get a message is not always enough to attract your attention, there's another element that you can add to the alert – light. By going to Settings > General > Accessibility and scrolling down to the 'Hearing' section (this feature is designed for people with hearing impairments), you can turn on 'LED Flash for Alerts'. 

9. Switching Direction. You can change the direction of your Panorama photograph in the Camera app by tapping the arrow that appears in the middle of the screen in the Panorama mode.

10. Headphones for a Selfie. When the camera app is open on your iPhone, you can use the volume up button on your headphones to take a photo. Not only does this reduce shake, it also means you can take a more natural-looking photo from further away or take a photo hands-free.

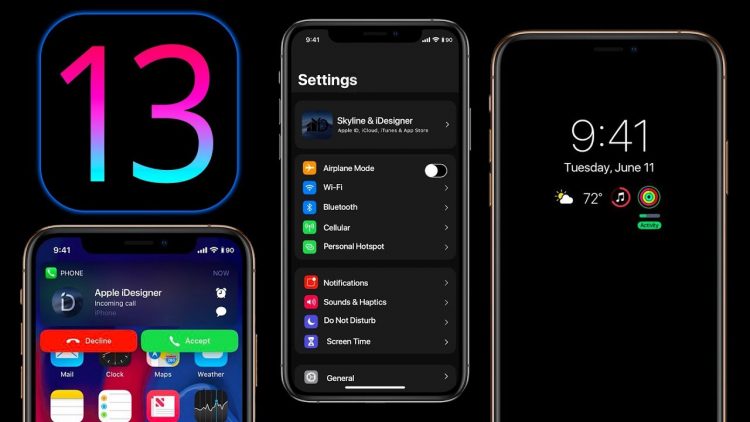
iOS 13 To Introduce Dark Mode

Image Credit: ilounge.com Dark mode has been the most-wanted feature on mobile phones and Google and Samsung are making sure of that. While ...